
It wasn’t long after I bought my Traxxas Rustler VXL that I knew I had a problem.
Even as a relatively new RC driver, I’d quickly outgrown my entry-level Rustler, so I upgraded to the 2WD Rustler VXL.
But I had a lot of trouble launching the car without it doing a standing backflip. So I decided to install the adjustable wheelie bar to help me get all that power down effectively.
What’s Included in the Package
We’ll install the blue Traxxas Wheelie Bar (part number 3678X) on my Rustler VXL.
You’ll find a pre-assembled wheelie bar, three mounting screws, and instructions in the package.
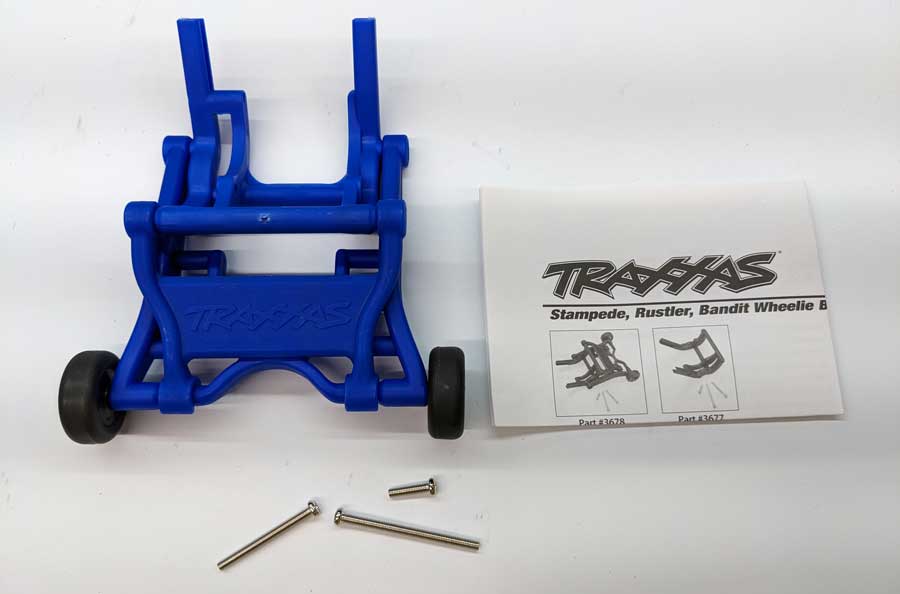
This model allows you to install it as-is or remove the wheels to install a different color motor guard. Since I’m concerned about keeping my car planted on the ground, I’ll install it in the wheelie bar configuration.
Important note: My wheelie bar came with three Phillips screws. However, the screws you’ll replace on your Rustler are 2.0mm hexagon screws. I don’t know if this was a mistake on Traxxas’ part, but it’s odd that I need two types of screwdrivers to complete the installation.
How to Install the Traxxas Wheelie Bar (3678X)
Installing a wheelie bar on your Traxxas Rustler is typically a straightforward process that can be done with basic tools. You’ll need a 2.0 mm hexagon screwdriver and a small Phillips screwdriver.
First, remove your Rustler’s left rear wheel to make removing the three mounting screws much easier.
The main two screws are on the left-hand side of the vehicle, as shown in the image below. Part # 2582 (3x30mm) and 2592 (3x40mm).
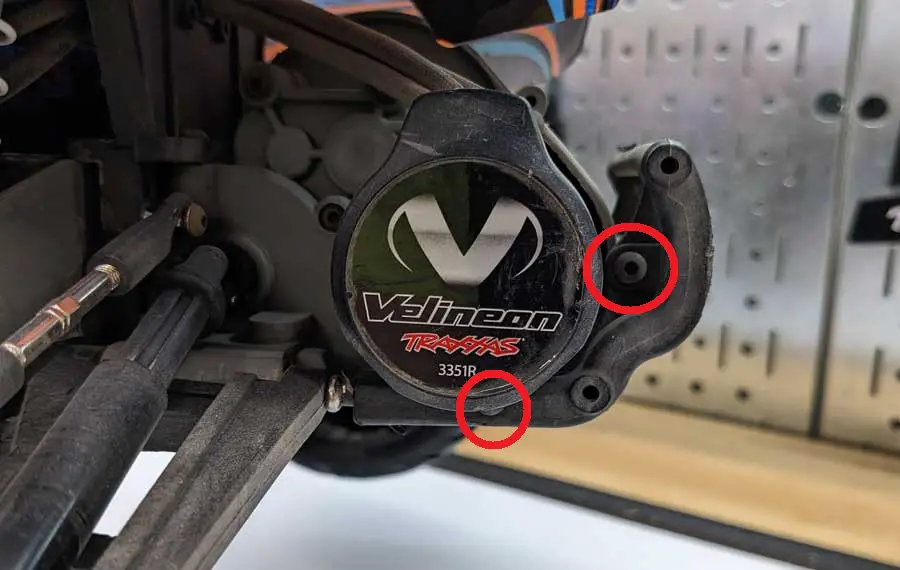
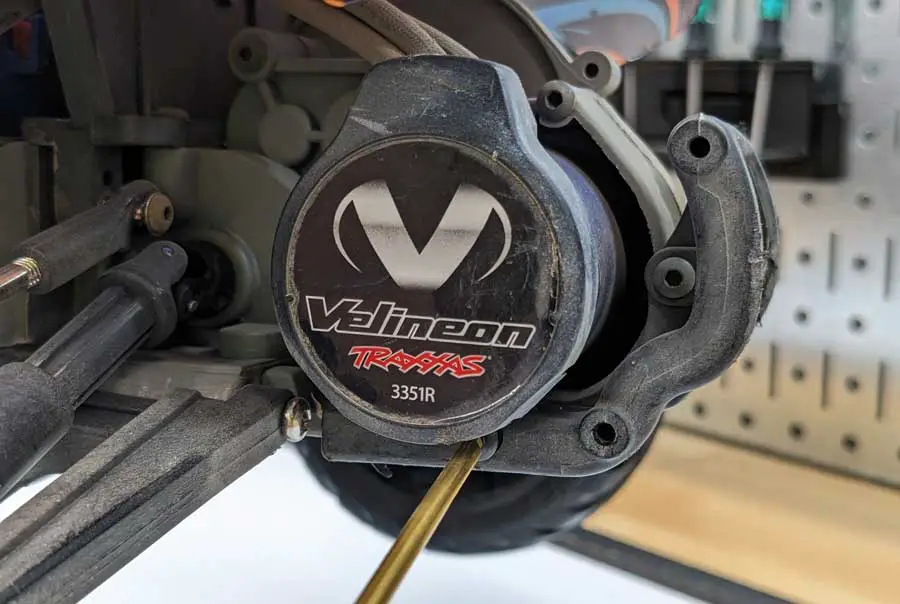
Once you remove them, turn the car around and remove the last mounting screw on the right-hand side of the motor cover. Part # 2578 (3x12mm).
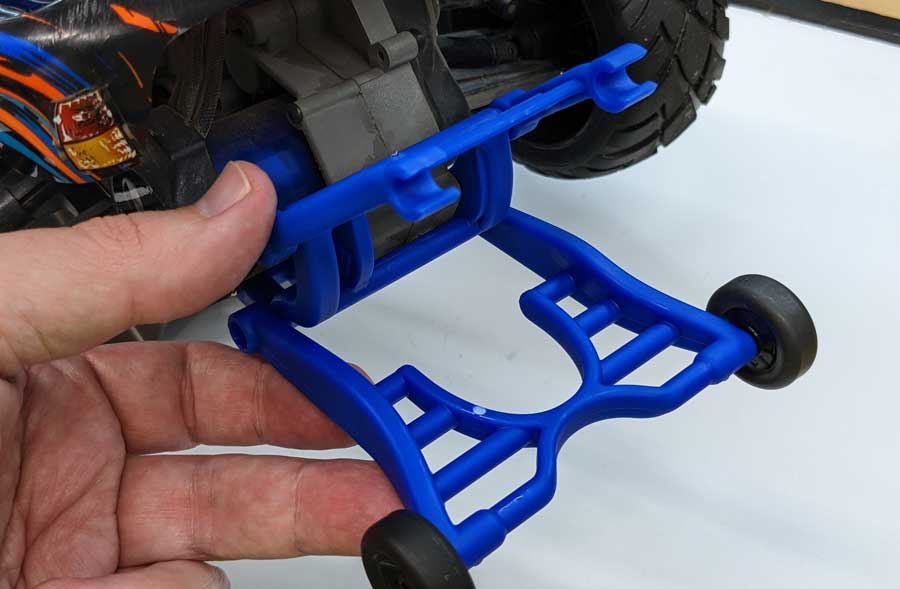
Here you can see the size difference between the wheelie bar and the stock mount. Without the adjustable wheel section, the wheelie bar is virtually identical to the Rustler VXL motor (Part # 3677).
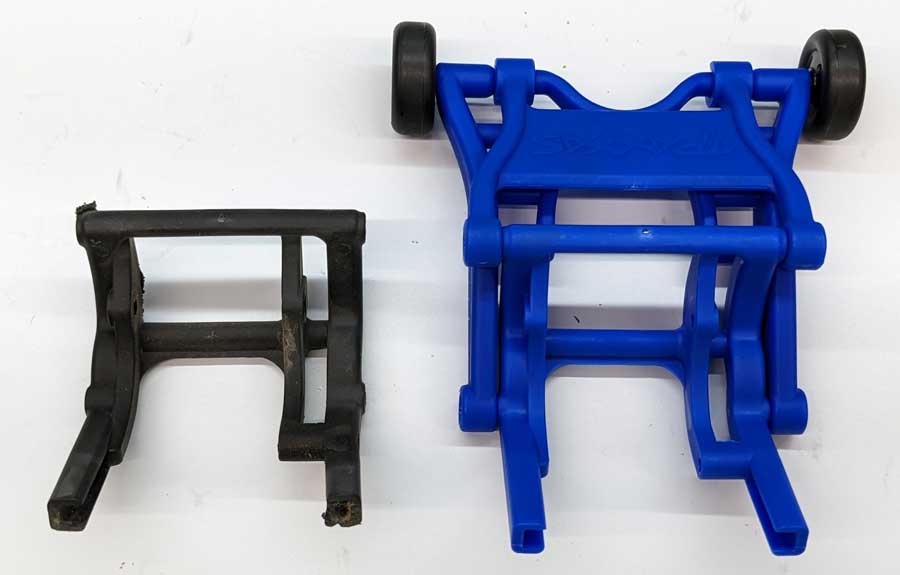
With the stock mount removed, I test-fit the new wheelie bar to understand how it would fit.
I could tell right away that I wouldn’t be using the adjustable wheelie bar in this position, but I decided to adjust that later once everything was installed.
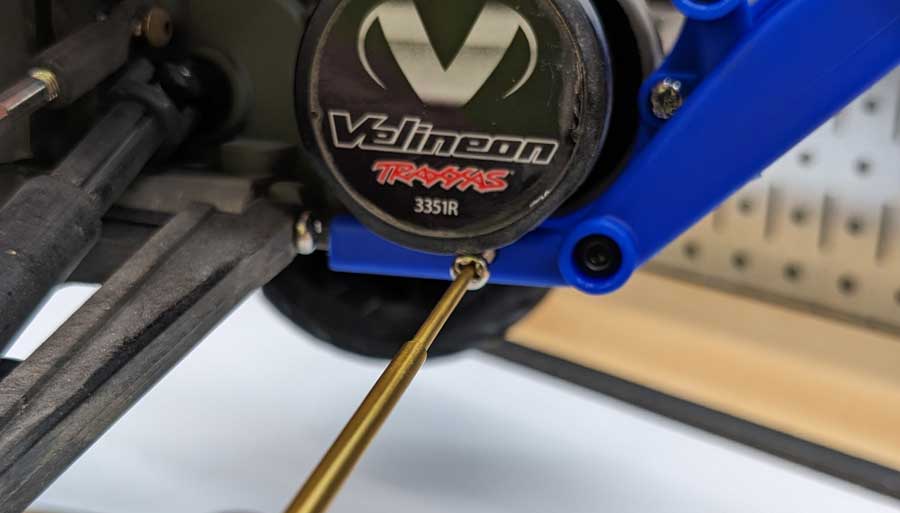
Once you’re satisfied with how it looks, screw in each of the new screws. I started with the 3×12 mm screw on the car’s right-hand side.
Remember, the new screws are Phillips-head screws, so be sure to change screwdrivers.
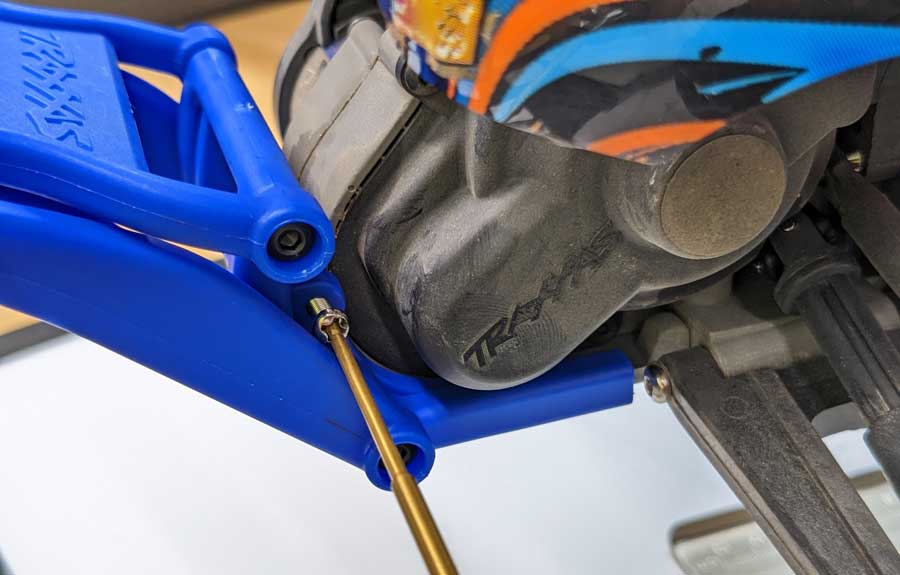
Followed by the 3x30mm screw…
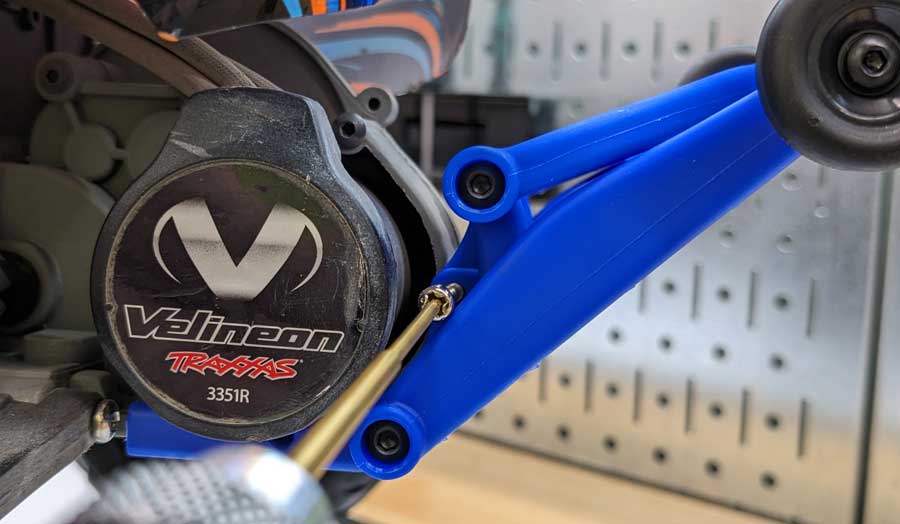
…and finally, the 3x40mm screw.
Overall, the entire process should only take a few minutes from start to finish.
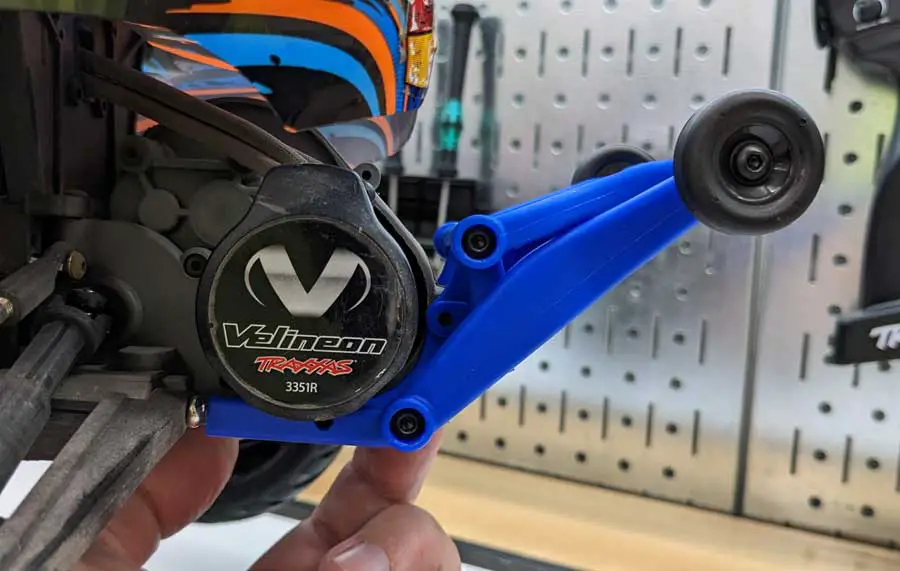
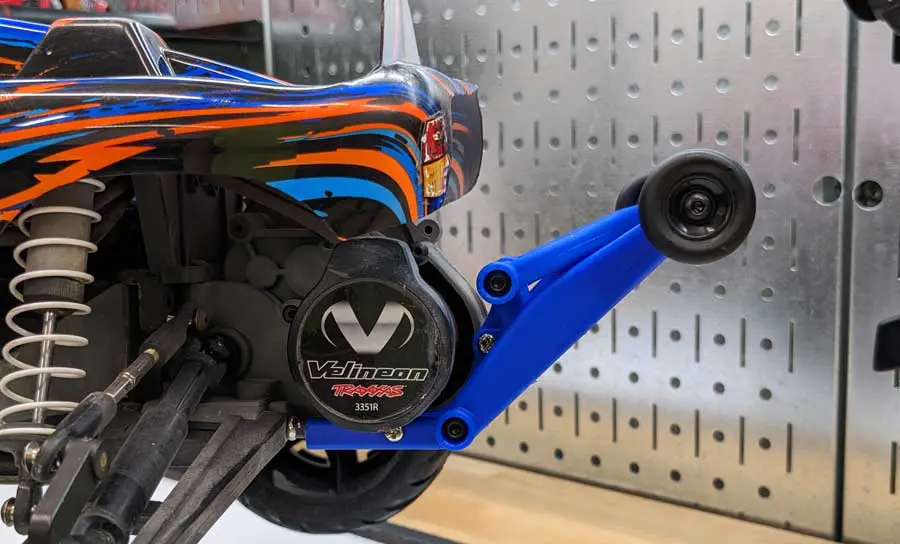
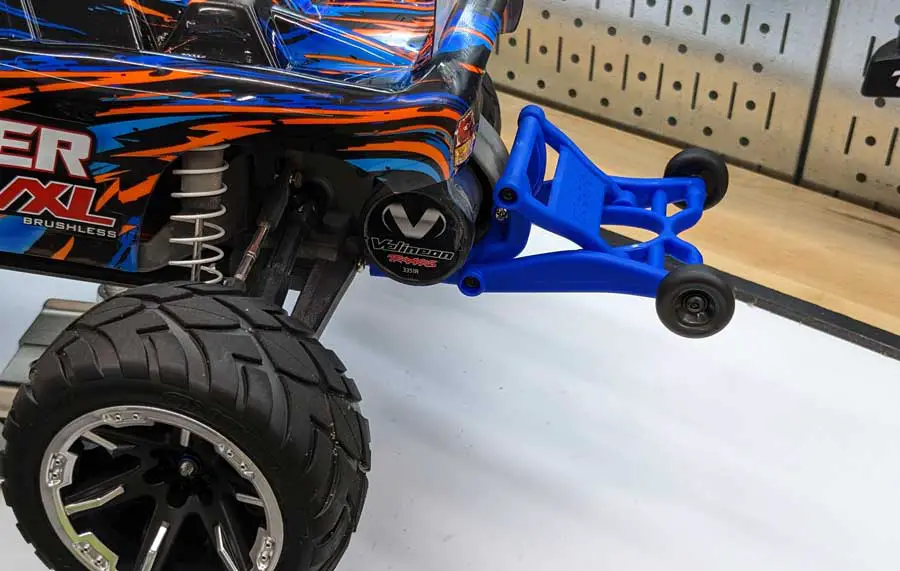
Here’s how the new blue wheelie bar looks on my Rustler VXL.
Setting the Wheelie Bar Height
The Traxxas wheelie bar is height-adjustable to four separate positions. It’s easiest to change the settings once it’s installed on your vehicle.
Simply detach the two clips, move the bar to the desired height, and snap the clips back into place.
You’ll need to play around with the height settings, depending on how you’ve got your Rustler configured. I was setting up for a street run, so I configured it in position #3 (second lowest) to help me get flatter launches.
When I go off-road, I’ll move this up to position #1 or #2.
Traxxas Adjustable Wheelie Bar (3678): Overview
I’ve never been a fan of drag racing, so seeing the wheelie bar on the bar of my Rustler VXL took some getting used to.
I think it detracts from the rugged look of the car. However, it definitely makes launching the vehicle easier.
This wheelie bar is made from composite nylon (plastic), making it more flexible than other aluminum wheelie bars. This model is aimed at RC cars that spend most of their time off-road but still want additional stability for speed runs on pavement.
Plastic wheelie bars tend to be more flexible than aluminum wheelie bars, which can help absorb the impact of crashes and reduce the likelihood of damage to other vehicle components.
It’s also lighter than aluminum wheelie bars, so the weight savings can help make your RC car faster around the track.
FAQ
What’s the point of a Wheelie Bar?
The purpose of a wheelie bar is to prevent the front wheels of a remote-controlled car from lifting too high off the ground during acceleration, which can cause the car to flip over backwards. A wheelie bar provides a stabilizing force that keeps the car level and helps it maintain traction.
Will the Wheelie Bar fit my specific RC car model?
The Wheelie Bar is designed to be compatible with most Traxxas 1/10 scale RC cars, including:
- Bandit & Bandit VXL
- BIGFOOT
- Ford F-150 Raptor
- Rustler & Rustler VXL
- Slash & Slash VXL
- Stampede & Stampede VXL
Is the Wheelie Bar easy to install?
Yes, installing the Wheelie Bar is a relatively simple process that can be done with basic tools. The Wheelie Bar mounts onto the rear of the car using the stock mounting locations and can be adjusted to suit your specific needs.
Will the Wheelie Bar affect the performance of my RC car?
While adding a Wheelie Bar may add some additional weight to the rear of the car, the impact on performance is typically minimal. In fact, the additional stability and control provided by the Wheelie Bar may actually improve your driving experience, particularly if you enjoy performing stunts or high-powered maneuvers.
Will the wheelie bar provide additional protection for the motor and transmission case?
The Traxxas adjustable wheelie bar provides an extra level of protection for the motor and transmission case on your remote-controlled car. The durable composite nylon construction of the wheelie bar absorbs the impact of the car landing on its rear wheels after performing a wheelie, which can help prevent damage to the motor and transmission case.